
I absolutely love the dollar store for picking up things for my classroom. They have so many different things you can use at school. While there are things to avoid buying at the dollar store, you can grab cheap craft supplies, classroom decor and borders, inexpensive snacks, and a whole bunch of other things you might need at school. One of my favorite things to buy at the dollar store are containers! I absolutely love containers, so I get really excited when I find some great ones!
One container that teachers have been (rightfully) going gaga over are the mini snack containers that Dollar Tree carries! Though you can typically find these year round at some Dollar Tree stores, they are usually in stock during Back to School. Usually, you get 2 for $1, making these containers 50¢ each, but during BTS, they usually come in a pack of 3, making them about 33¢ each! Crazy, right? If for some reason you can't find them at your local store, or you are unlucky enough to be far away from a Dollar Tree store, you can order a case of these online. A case is 24 packages of 3, so you'll receive 72 of these awesome snack containers. You might consider splitting a case with a friend if you don't think you'll use that many, but then again, you might want to keep them all for yourself!
I have found so many ways to use these handy containers in my classroom, and I thought I would share a few of the ways I've found with you!
1. Holding playing cards: I used to use Ziplock baggies to hold the cards I used for math games. I used to separate sets of cards and put them in Ziplock baggies, but little Kindergarten and first grade hands made quick work of destroying the baggies and getting cards everywhere. It drove me crazy! Now, I just place each set of cards into a mini container and snap the lid closed. The students can keep the cards inside the container to play a game and just pull one card out at a time, which makes everything so much neater! Lost cards happen so much less frequently that way.

2. Crayon holder: A 24 pack of crayons fits perfectly into a mini snack container. Throw away those boxes and place your crayons into these handy containers! You can keep them at centers, or give a box to each student to keep. I usually have around 24 students, so an entire class set costs me about $8 if I stock up when they are a 3 pack! You can label the lid with the child's name so they don't get mixed up.
This would also be a great way to store multicultural crayons. Just place the set of crayons in one of these boxes and have them handy for students to grab during writing time, or whenever they are drawing pictures of people. I like to keep mine separate just for this purpose.

3. Mini eraser storage: I am just as wild about those little mini erasers as most teachers seem to be right now, but storing them has always been an issue! I've tried a few different ways, but these mini snack containers are a great way of storing mini erasers. Since these containers are so inexpensive, it's easy to grab a bunch and store all your erasers without breaking the bank! You can also use them to put in erasers as game pieces or manipulatives for students to use during math or literacy centers. When they are finished, the students just clip the lid back on and put them away. It helps eliminate the chance of those little erasers spilling all over the floor too!


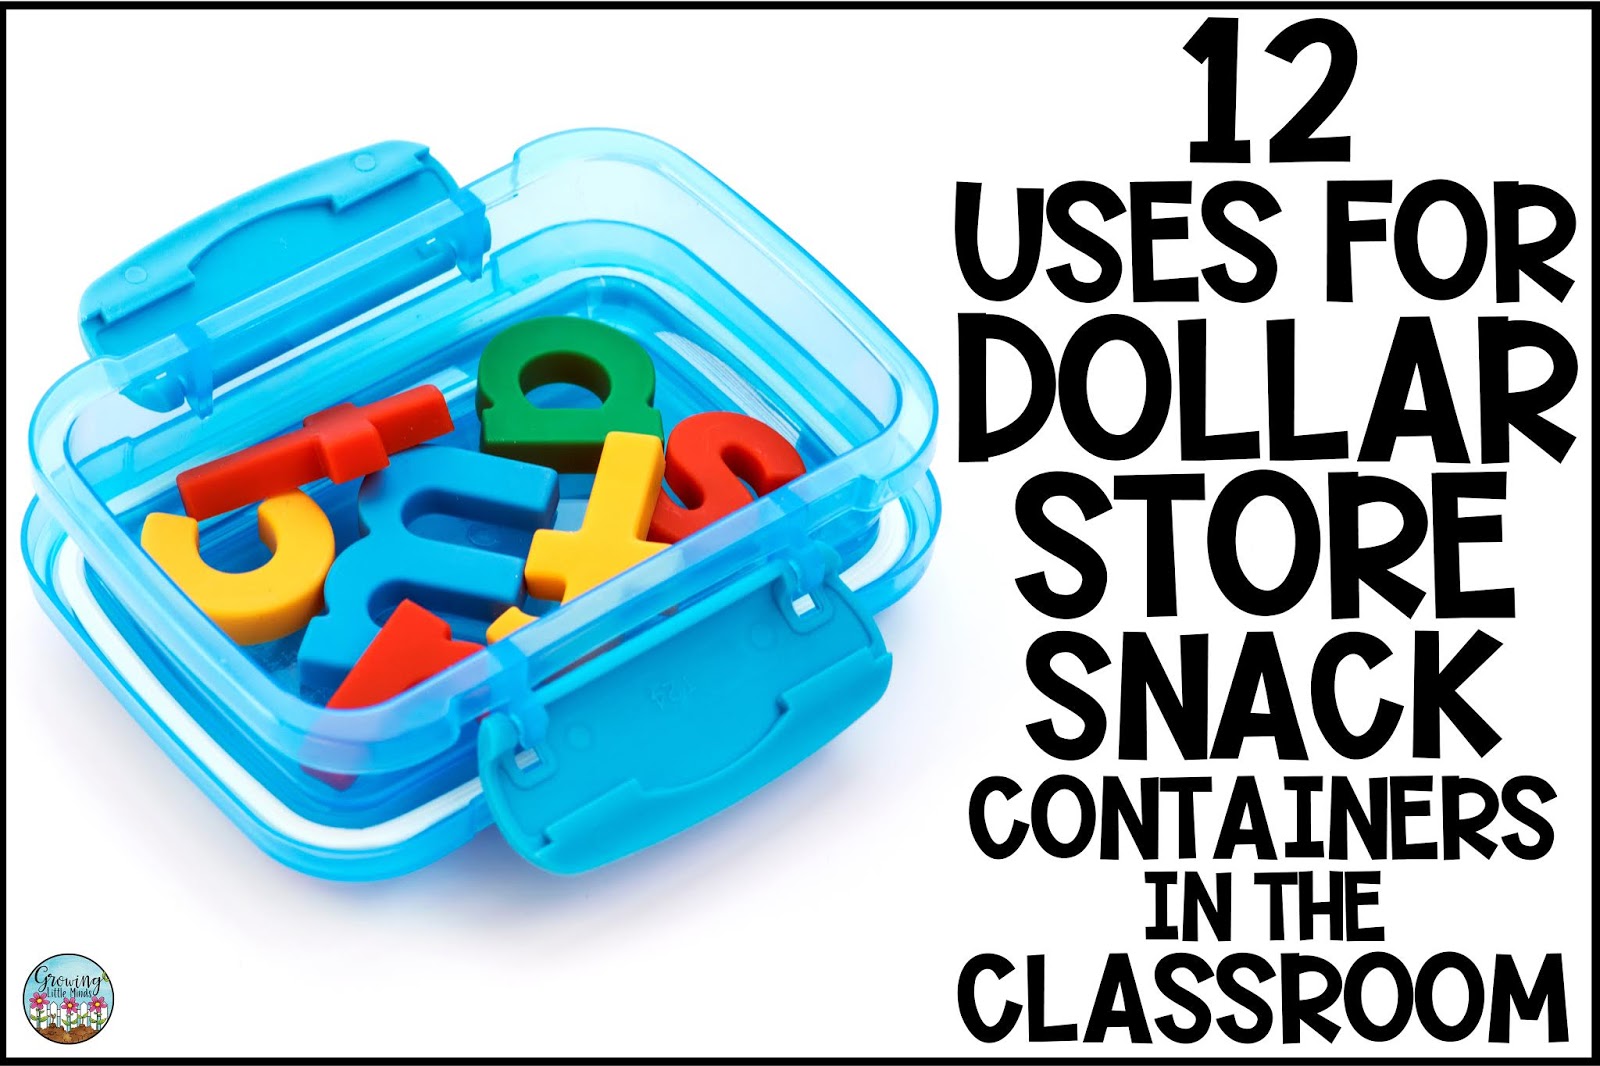
5. Storing magnetic letters and numbers: These are a great way to provide your students with magnetic letters for spelling words or magnetic numbers for completing math problems, matching, etc... When they need a set of magnetic letters, they can just grab them! These magnetic numbers came from the Target dollar spot, but you can use whatever you have!

6. Mini reading kits: I just LOVE having things handy, and during Guided Reading is no exception! Inside these little mini reading kits, I have a pointer finger for 1-1 matching, a Slinky for stretching out words, and erasers to use for sliding sounds in Elkonin boxes. I can even add the magnetic letters for the word we are learning that day to the box if I'd like. I just give each student a box when they sit down and they have what they need for a quick phonemic awareness lesson before reading.

7. Making Words: I do a lot of Making Words with my students using the phonics sound we are using for the week. Sometimes we do it in small group, and sometimes we do it in whole group. I can put the letters that they will need for our Making Words lesson in these containers and hand one to each student. By doing this, I make sure they have just the letters they need so there are no distractions, arguments, or somebody saying they can't find something!

8. Name Boxes: Do you have a student who is struggling with spelling their name? Use these handy containers for name boxes! Just place the letters of their name in the box and tape their name to the lid. Then they can practice their name using the model on the top of the box, and once they start to get the hang of it, they can try it on their own. I used to use my assistant or our volunteer Granny to pull students to work with struggling students on their names.

9. Name Puzzles: This is similar to the name boxes idea, but instead of magnetic letters, you can make a name puzzle for the student. I have Name Puzzle templates in my Name Game activities pack in my store. Write down the letters in the child's name, cut it apart, and place the letters inside the box. Like with the Name Box, tape their name to the lid as a model. They can take out the puzzle, build it, and use the model to check for accuracy.

10. Letters I know/Letters I don't: As students learn letters, it is suggested that they work in their zone of proximal development- that is, learning a few new letters at a time while continuously practicing the ones they do know. You can make your students a personal letter box using a snack container. In each box should be the letters in the child's name as well as letters they already know. If a child knows less than 10 letters, you should add two of each letter to the box. Once they have learned at least 10 letters, you can remove the duplicate letters from the box. When they learn new letters, add those letters to the box until they have learned them all.

11. Word Work Boxes: These boxes are perfect for mini word work centers! For this center, I typed up the letters for each word in a box, cut them out, and punched holes on either side. Then I added links. The students practiced spelling words- either our sight words for the week or extra practice with our phonics sound for the week.

12. Mini Fluency Boxes: Grab a sand timer, a set of dice, flash cards, or a spinner and make a mini Fluency box! Fact fluency is a big deal in my classroom, and I am always giving students time to play fluency games or practice their facts. These mini fluency boxes are easy for students to grab or just keep in their desk! They can practice rolling the dice and adding the numbers together or subtracting the smaller number from the bigger number. The boxes will keep their flash cards handy and safe. With the sand timer, they can time themselves on practice quizzes or flash cards.

Does anybody else want to RUN to their nearest Dollar Tree and grab some more of these awesome little boxes? I know I do! What is your favorite way to use these handy little boxes?
Don't forget to pin this post so you can easily find it again!


